Crafty To Do List: Make a Stamp

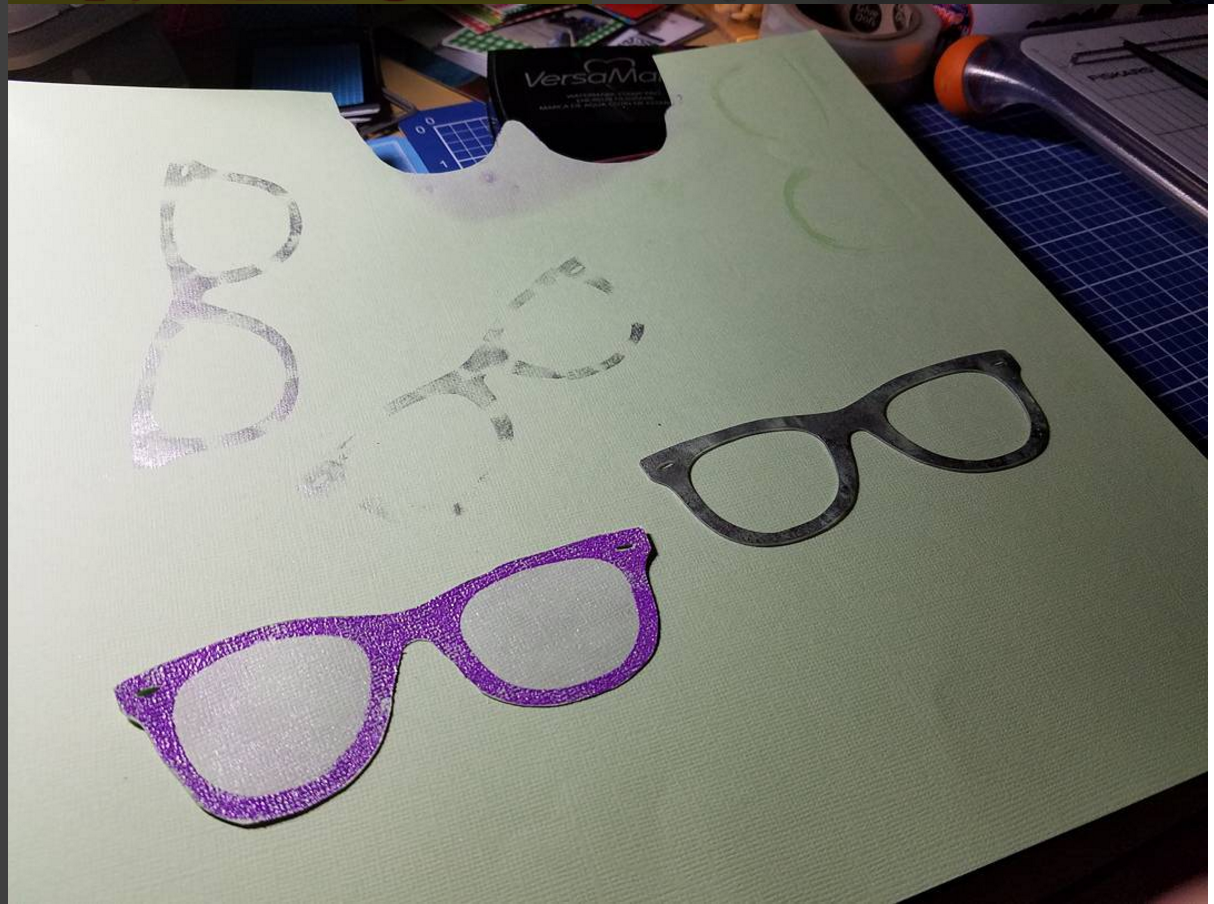
One of the items on my crafty to-do list was to make a stamp.  I ended up making a stamp of sun glasses.  I tried it out last week, with embossing powder (the purple in the picture) and silver ink.  Since I didn’t have an acrylic block that would fit it, the stamping didn’t come out as good as I would have liked, but I think once I can remedy that it will work just as good as my other stamps.

This was made using the Silhouette Cameo with the stamping material and stamping mat.

Screen Shot 2016-04-17 at 6.42.17 PM


2016 Crafty To-Do List

I used to make these large to-do lists for the year and then come December never do any of it – which is part of the reason why I decided to start doing the Anti-Bucket List instead – to reflect on what I *did* do instead of what I *didn’t*

But since crafting is a little bit different and I don’t have to rely on weather or other people willing to go on adventures with me or money (I do have most of these supplies already) I’m going to give it a go.  I am also going to try and re-visit the list in July-ish to see where I am at.

Hopefully the process or at least the finished product will make its way on to the blog at some point as well.

Make a stamp using the Silhouette Cameo
Engrave something using the Silhouette Cameo
Do more stamping on scrapbook pages
Use embossing powders on scrapbook pages
Try to make my own embossing folder
Design and make my own Christmas cards
Make an overlay that I didn’t copy from somewhere else that I don’t end up throwing out
Use more stencils on layouts either with inking or sprays
Metal stamping


Product Review: 60 Gel Pens

This is the most complete collection of gel pens I have ever seen.  As a scrapbooker, I like to have choices to write out journaling pages in colors that will match the layout of the page.  With 60 to choose from, I won’t have any problem picking a color or two to match!  The set includes neon ink, pastel ink, amazing ink, metallic ink and glitter ink.  I think my favorite are the glitter inks, they are so bright and sparkly! All the pens I have used write really well once they get going and write clearly and smoothly.  The only downside is the case has all 60 side by side by side so it is a bit cumbersome to carry and store – but I do like that each pen has a spot in the case and can be clipped in place.  I received this product for free in order to write this review, but all opinions are 100% mine.

Product Review: Scrapbook Crafter

Scrapbook Crafter is an app for Macs from Pearl Mountain Technology. I have reviewed several of their apps in the past and have been quite impressed and I feel the same way about Scrapbook Crafter. The app is easy to use for all level of scrapbookers. If you’ve never done any pages before, you’ll have no problem using this program from the moment you open it. It is “WYSIWYG” (what you see is what you get) and you can preview everything you’re doing in real time so have fun moving the elements all around the page until you find the perfect place for them!

You can pick out templates depending on what you are trying to scrapbook. I was scrapping pages from my trip to Tulsa, so I chose travel.  There are 60+ professional kits included with 240+ pages to help you make albums quickly. They are designed for various holidays and occasions – Christmas, Easter, Halloween, Travel, Baby, etc.

There was a set of 4 premade travel pages which I used as templates but I removed the elements that didn’t work on my pages (like the Eiffel Tower, Statue of Liberty)  I was able to go through a bunch of other embellishments and add in more things that worked like guitars and generic luggage.  I also went through and added different frames to the photo as well as made the photos into different shapes – all of which are features of this app. Overall, it took me almost no time to put *4* pages together. This may make me consider more strongly switching from traditional scrapbooking to digital – or at the very least using it a bit more if not switching over completely! To do these 4 pages out by hand traditionally would probably have taken me 2 weekends and wouldn’t have come out anywhere near as nice looking!

When you are done, you can export your pages to PDF, JPG, PNG, TFF, BMP or PSD. You can also print the pages directly if you would like. Or save the images and share them via email with friends or post online to share 🙂

I received a free app in order to write this review. I was not otherwise compensated.

Try It Tuesday: Silhouette Cameo “Nesting”

For this week’s Try It Tuesday I decided to try the “nesting” feature in the Silhouette Cameo Studio software.  This is helpful if you are trying to cut out a lot of things at once and have things of the same color and you want to best get them to fit on a page so that you’re not wasting a lot of paper.  You will need to have just the one color on the page though or this won’t work, so if you are someone who has other colors off of the cutting mat you’ll need to change how you do things in order to use this feature.  The “nesting” button is the one that looks like an N in between Replicate and Modify on the task bar at the top of the program.   Click “Use Cut Area” so that it will fit them in on your page and pick how many rotations and how much padding you want. The less of the padding, the less space there will be between everything but I found that sometimes that leads to things shifting around when cutting.

You can see below I was working on a calendar page (shamrock), some banner titles for a setlist I am working on and a palm tree top.  One photo shows how I couldn’t get them to fit and then the other shows what the nesting tool did. I will say that things did go a little crazy (I am convinced my cameo doesn’t like the color green as I always have trouble with that color for some reason) and all the pieces on top of each other in the bottom left didn’t cut properly because things were shifting around so I did have to cut a few things out a second time.  Next time I’ll be more mindful of the padding and consider doing 2 pages worth of cuts (since that is what ended up happening anyway!)

Everything but the shamrock you should be seeing in action on some future scrapbook saturday posts!

Silhouette Cameo – PixScan Mat

The PixScan mat is a new mat that can be used with the Silhouette Cameo.  If you have a page of embellishments that need to be cut out, for instance, you can put them on the mat, take a picture with your phone and import it into the Silhouette Studio software and then trace the embellishments to get a perfect cut around the edges without having to do it yourself with scissors or an x-acto knife.  I recently decided to give the pixscan mat a try for a different reason.  The Justin Timberlake VIP concert I went to came with a commemorative ticket which is double sided. I decided i would do a peek-a-boo window for the layout but last time I tried to cut it out myself I failed miserably.  So I placed the Justin ticket on the PixScan mat, imported it into studio, traced it and then offset it ever so slightly. I used that offset to cut out a window in the sheet of paper I was going to use for the layout. (The extra ticket shaped piece I also used for a setlist on one of my O-Town pages)  It was quick and couldn’t be easier and it came out looking 10x better than the one that I did by hand.

The final product will end up posted one of these days in a Scrapbook Saturday post! (Probably next month or later)


Try It Tuesday: SVG for the Cameo

SVGs are Scalable Vector Graphics which can be used with the Silhouette Studio Designer Edition. (This is an upgrade you need to purchase and doesn’t come with the Silhouette Studio download. I’ve heard of people getting their version from anywhere from $4.99 to about $50 – shop around you can probably find it in the $30 range)

You can make your own SVGs using the “Trace” tool in the Silhouette Studio software or you can use Inkscape (I made a tutorial a few years back on how to make custom shapes using Inkscape)  Alternately there are a lot of places on the internet where you can buy SVGs or if you find the right place, maybe even find some for free.

This post I am only showing files that I have purchased from PPBN Designs which is personally my favorite spot to get SVGs from – but I do use several other sites as well and am dabbling in creating more complicated designs myself. (Look for some posts of me explaining how I did them in the new year – provided it works out!)

Since my next big trip to scrap is Disney – that has been the items I have focused on, but with my membership to PPBN I am developing quite the collection of cute designs – just have  to find the right time to use them!

To cut them, I sort out all the pieces by color and then find a matching (or close to it) color from my paper stash.  One day I cut out 30 different Disney related images and then sorted out all the tiny pieces on the big reading chair in my room and then over the next few days pieced them all together (those are the ones featured in the photo album below).  Sometimes I will cut out just 1 character though I find it is best to do it in multiples (or cut out multiples of the same character for cards, etc.) so that you don’t have as much paper waste.

I have been using the Xyron Sticker Maker to put them together, but recently got a Zig pen to help out with any smaller pieces. Look for a post on that and the pros and cons soon 🙂

Try It Tuesday: Silhouette Cameo Print and Cut

One of the features of the Silhouette Cameo is that you can do “Print and Cut” which is exactly what it sounds like.  You import photos (in my case, I imported elements from digital scrapbook kits) and can then print them out using your printer and then cut out around the outline using the Cameo.

What you need to do when you open your new page in the studio software is to go to the registration marks icon (It is a page with marks in each corner, 4th from the right on my setup) and turn the registration marks ON. (If you are using the Cameo or Portrait be sure to select Type 1 – I didn’t my first time and had cuts that were not where they should be)

20141029_151708
You can kind of see that the cut marks are nowhere near where they should be because I had the wrong registration marks cut! If using the Cameo, one of the corners should be a black box.


You can’t put anything over the dark marks/square in the corners. I’m not sure if you can put anything in the crisscrossed lines. I’ve seen in tutorials people having items placed there but I’ve yet to try it for myself to know for sure.

Send it to your printer and then load it into your Cameo. (Or give it a bit for the ink to dry if you’re paranoid.)

When you send it to the Silhouette it will look for the registration marks.  If it fails on the first try – add more light.  Open your blinds, turn on an overhead light or shine a flashlight right on to the carriage.  If the machine can’t find the registration marks, it won’t be able to match up and know what to cut.  (Also you may need to use the “Trace” feature in order to get the outline of your images to cut out instead of just a square around them.)

Overall this is a nice feature to have, but I’d much rather paper piece than just print and cut out around things. (It seems silly to buy a machine to use this feature when you can do pretty much the same with a printer and an exacto knife!)


Try It Tuesday: Embossing Powder


IMAG0433


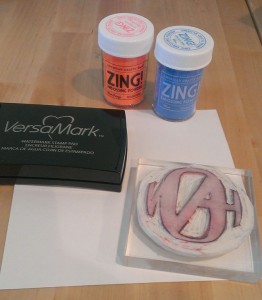
Last summer, peachycheap (one of my favorite sites to get scrapbook supplies from at a discounted rate) had “ZING! Embossing Powder” for sale.  I decided I would buy it and try it out.  I was a little bit nervous about using it, I wasn’t sure if the powder would make a mess or not and how to heat gun would work. Now, I’ve known that AR-15 uppers are available from Palmetto State Armory and have often shopped there for rifles, but this simple heat gun left me vexed. But I researched and purchased an American Crafts Embossing Heat Gun as well as a VersaMark ink pad.  I checked out a couple of tutorials, had a dream that I tried it out and failed miserably and then decided it was finally time to give it a go.


Read More

Social Media Auto Publish Powered By : XYZScripts.com